
Fall is one of my favorite seasons. There is just something special about changing leaves and cooler mornings that brings comfort to an ending year. So, when Aaron and I were deciding on a date for our wedding… a time and space where our family and closest friend will come to witness a pivotal point in our lives, October was an obvious choice. So with a full year and a half of planning ahead, I knew I had plenty of time to decide on what we’re prepared to take care of ourselves and what we will trust in experienced vendors. As I made my list, I began to consider how I may yield my own strengths. Growing up, I was always very creative and would spend hours inside craft stores just for inspiration. As a working adult, I simply have not invested as much time in this venture, but still have a penchant for creativity. So naturally, I began to consider handling my own floral arrangements. Doing so seemed like a daunting task in the beginning. They always look so complicated and the idea of picking the right greenery and flowers seemed impossible. But the idea of having a hand in one of the most intimate details of my wedding decor also excited me. So, I did a little bit of research and gave myself some homework. Full disclaimer, I am by no means a professional and could not offer half of what an experienced florist could, but I’ve definitely learned a couple of neat tricks that really worked for me! If you’re interested in what I did to create the centerpiece you see below, continue reading!!

After spending hours… perhaps more like weeks…. searching different styles on Pinterest, I finally decided that I really loved the look of flowers in a pedestal bowl. I found the design to be both elegant, yet demanding of attention. So, these are the materials I had gathered to accomplished this task!
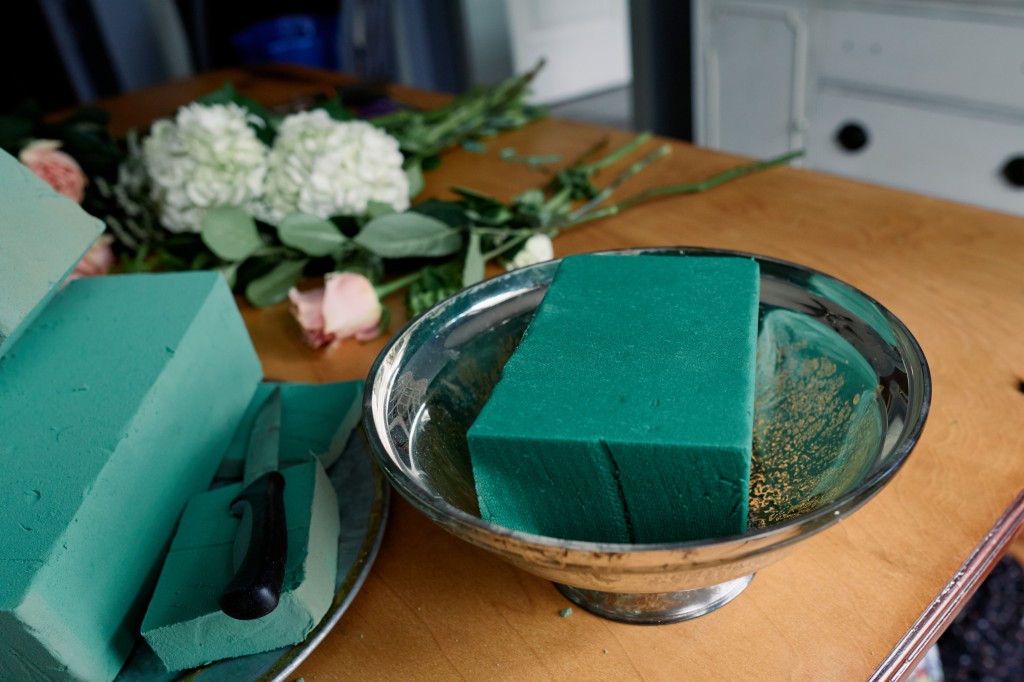
- Compote Bowl – I like the diameter of mine to be at least 5.5. inches. I really adore the cascading greenery and bowl would allow it to flow and expand the size of the overall design. I found mine at Wholesale Flowers and purchase them in gold for my wedding day. I used plastic bowls, but they were surprisingly sturdy and held the flowers and wet-foams just fine!
- Wet-foams – I got mine at Michaels, but I’m sure you can find them at any craft store. I needed to make 10-11 centerpieces, so I bought 3 packs of 3 just in case I made a mistake with one. You can find coupons online and save quite a bit of money!
- Floral Clippers- This is extremely necessary! Scissors will do, but efficiency may be impacted if you decide to forgo purchasing clippers. I really recommend the ones I purchased from Amazon, but I’m sure you can also find these in the stores.
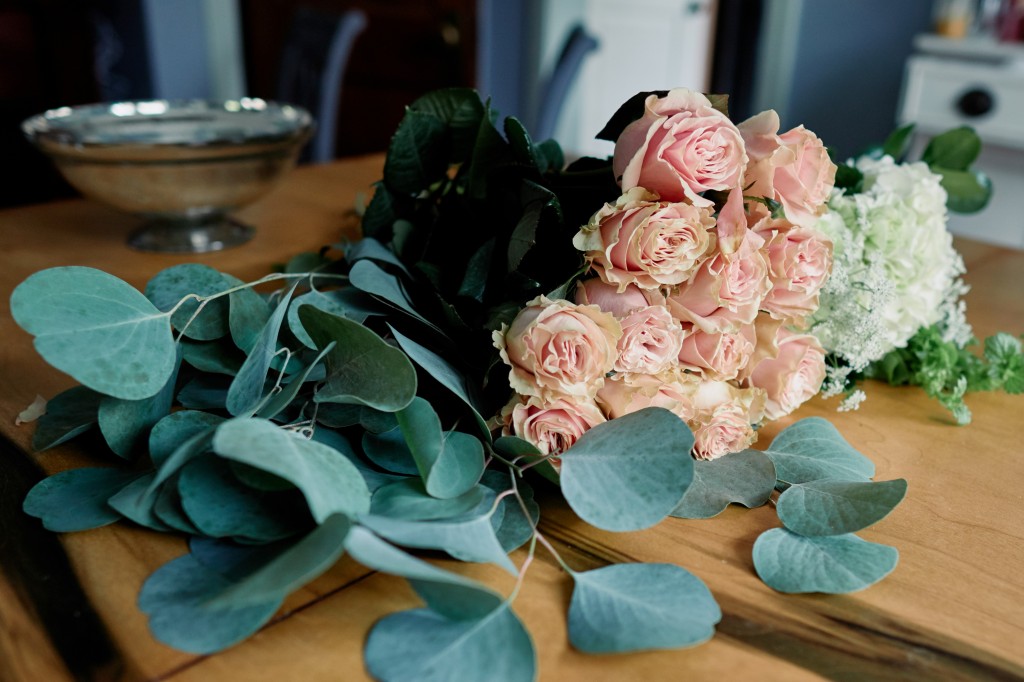
- Greenery- In the demonstration, I used silver dollar eucalyptus and Ireland bells (came with the white bouquets I bought) that I found at my grocery store. For my wedding day (pictured above), I used a mix of seeded eucalyptus, blue eucalyptus, and silver dollar eucalyptus from Sam’s Club (YEP… THAT’S RIGHT). Personally, I think as long as you have at-least two different types of greenery, you’ll have what you need to bring dimension and texture to your design.
- Flowers- You can keep it simple with just two types of flowers, or amp up the drama with an array of floral types. I’ve used only roses once, but they varied in type and color. For example, I mixed spray pink roses (multiple small roses on a single stem) and traditional white roses. I’ve also kept it all white, but used three different types of flowers.
For this demonstration, I am using a dozen light pink roses and a white bouquet. Included in the bouquet were white carnations, hydrangea, and baby breaths. For my greenery, I am using Ireland Bell and Silver-dollar eucalyptus. I found all of my flowers at Kroger.
First, layout your flowers. Hydrangeas may require a sprinkle of water on their petals to revive their liveliness. If you’re using roses, you may want to peel back discolored petals.

Take you foam and measure it up to the opening of your compote bowl. You’ll want to cut it down to where it is snugged when you fit it inside the bowl. Once you’ve cut it down, you’ll want to soak it in water. DO NOT RUN WATER OVER THE FOAM. I recommend filling up an empty bucket with water. Place the foam on top and allow it to sink on its own. You want the foam to be completely saturated with water. DO NOT PUSH IT DOWN. This will create air bubbles and risk shortening the life of your flowers. Allow it to soak for 3-5 minutes before pulling it out. Place the saturated foam into the compote bowl.
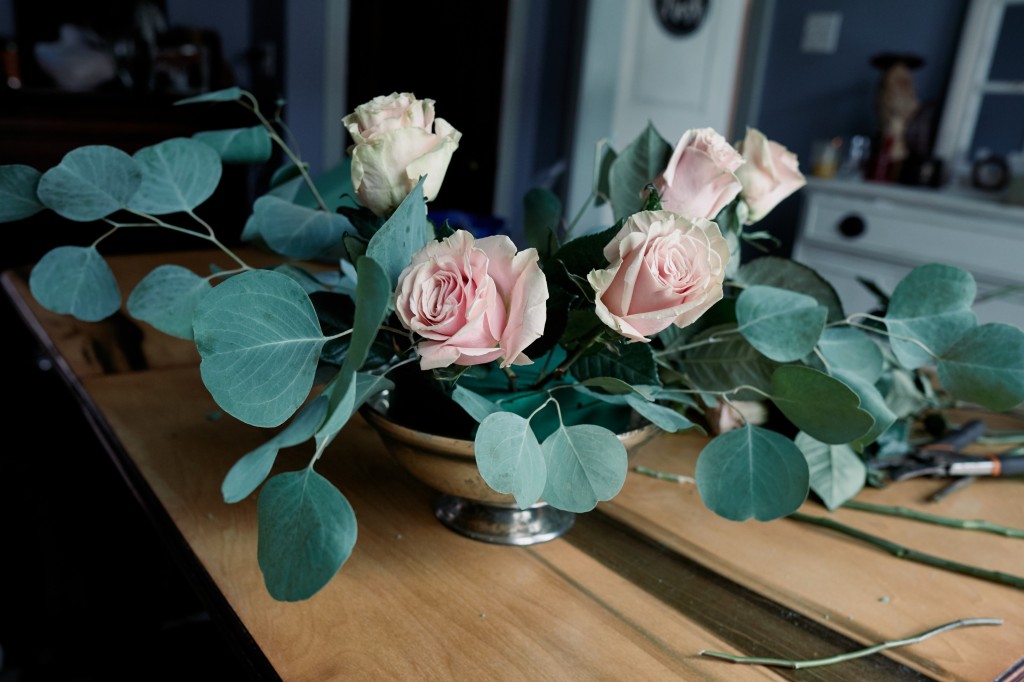
Next, add your greenery! Starting your design with the greenery will allow you to set the width of your centerpiece. Be careful when you placing your greenery in the wet foam. You want to avoid placing any leaf inside the foam to avoid bacteria growth, which will shorten the life of your centerpiece. You also don’t want to accidentally puncture all the way through. The stem should feel snug in order to ensure access to the water supply. If you have to reinsert your stem, avoid using the same space and choose a different area.
Also, I recommend rotating your bowl as you add your greenery and stepping back to examine your design. Make any changes you need to balance the piece.

Now, you can add the flowers!!! I like to start with the roses. In the beginning, I will start with 8 stems and leave the remaining 4 stems for later in order to fill in any gaps that I see. Similar to before, trim your stems to a desirable length. I preferred mine to be anywhere from 3.5 – 4.5 inches. Be very careful to not remove all of the leaves. While you do not want any leaves in the wet foam, flowers gain their energy through leaves. Once I have the 8th rose in the design, I begin to add my hydrangeas and carnations. Continue rotating the bowl as you go. Add the remaining 4 roses wherever you see fit.
When 75% of the flowers have been used, I recommend adding the Ireland Bells at this time. The Ireland Bells are such a statement piece that I recommend waiting until you have a clear picture of your design before adding them. They also have a thicker stem, so it’s very important to know exactly where you want to place them. It will create a large indention on the wet foam if removed, which can cause a big gap in your design since you will not be able to fill it in easily with your remaining flowers. That is also why I do not use this piece in the beginning with the eucalyptus.
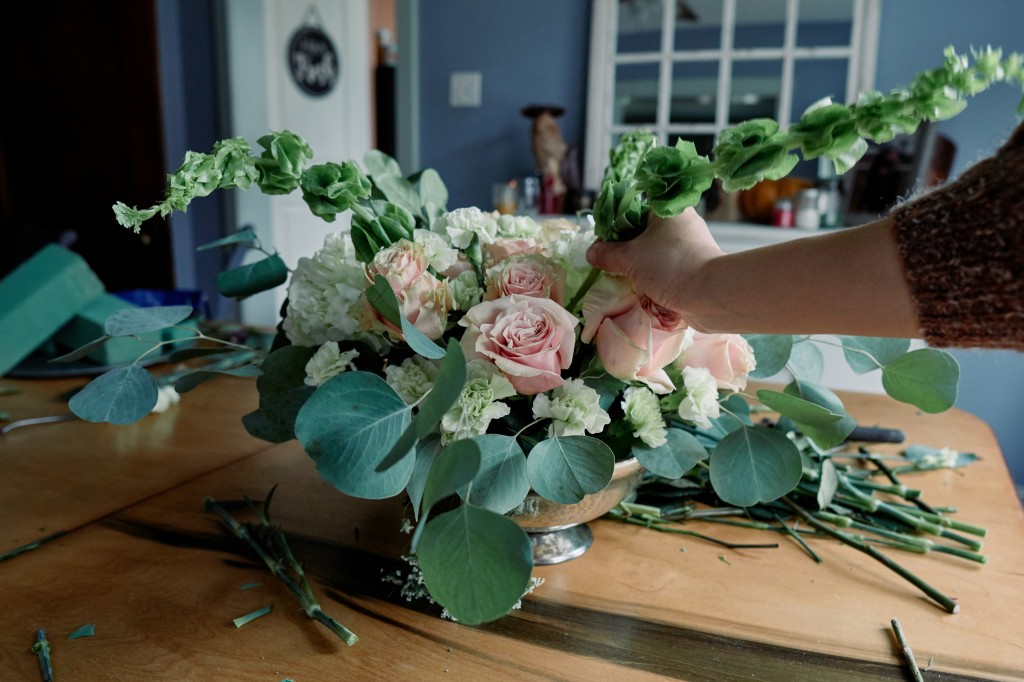
Carnations are AMAZING filler flowers! You can use them to cover up any part of the exposed wet foam on the base of your bowl. I use every single last piece and love the dimension it brings.


And that’s it! You have your final look! I really hope you try this for yourself and see how you like it! I provided a YouTube tutorial that I found to help those who would to see this in a video. Feel free to practice a few times before your big event to make sure you feel comfortable with the task. But as you’ll soon find out, it’s a lot simpler than it looks. Good luck!!!!
